LUIDA Docs

About LUIDA

A framework for designing, running, and analyzing VR experiments end-to-end. Each component's role and the screens you'll touch in the Web Console and Unity template, in one page. (The metaverse platform LUIDA currently targets is Cluster.)

LUIDA is a metaverse-based framework that lets you run a VR experiment end-to-end, from participant recruitment through data analysis. It currently runs on Cluster.

System overview
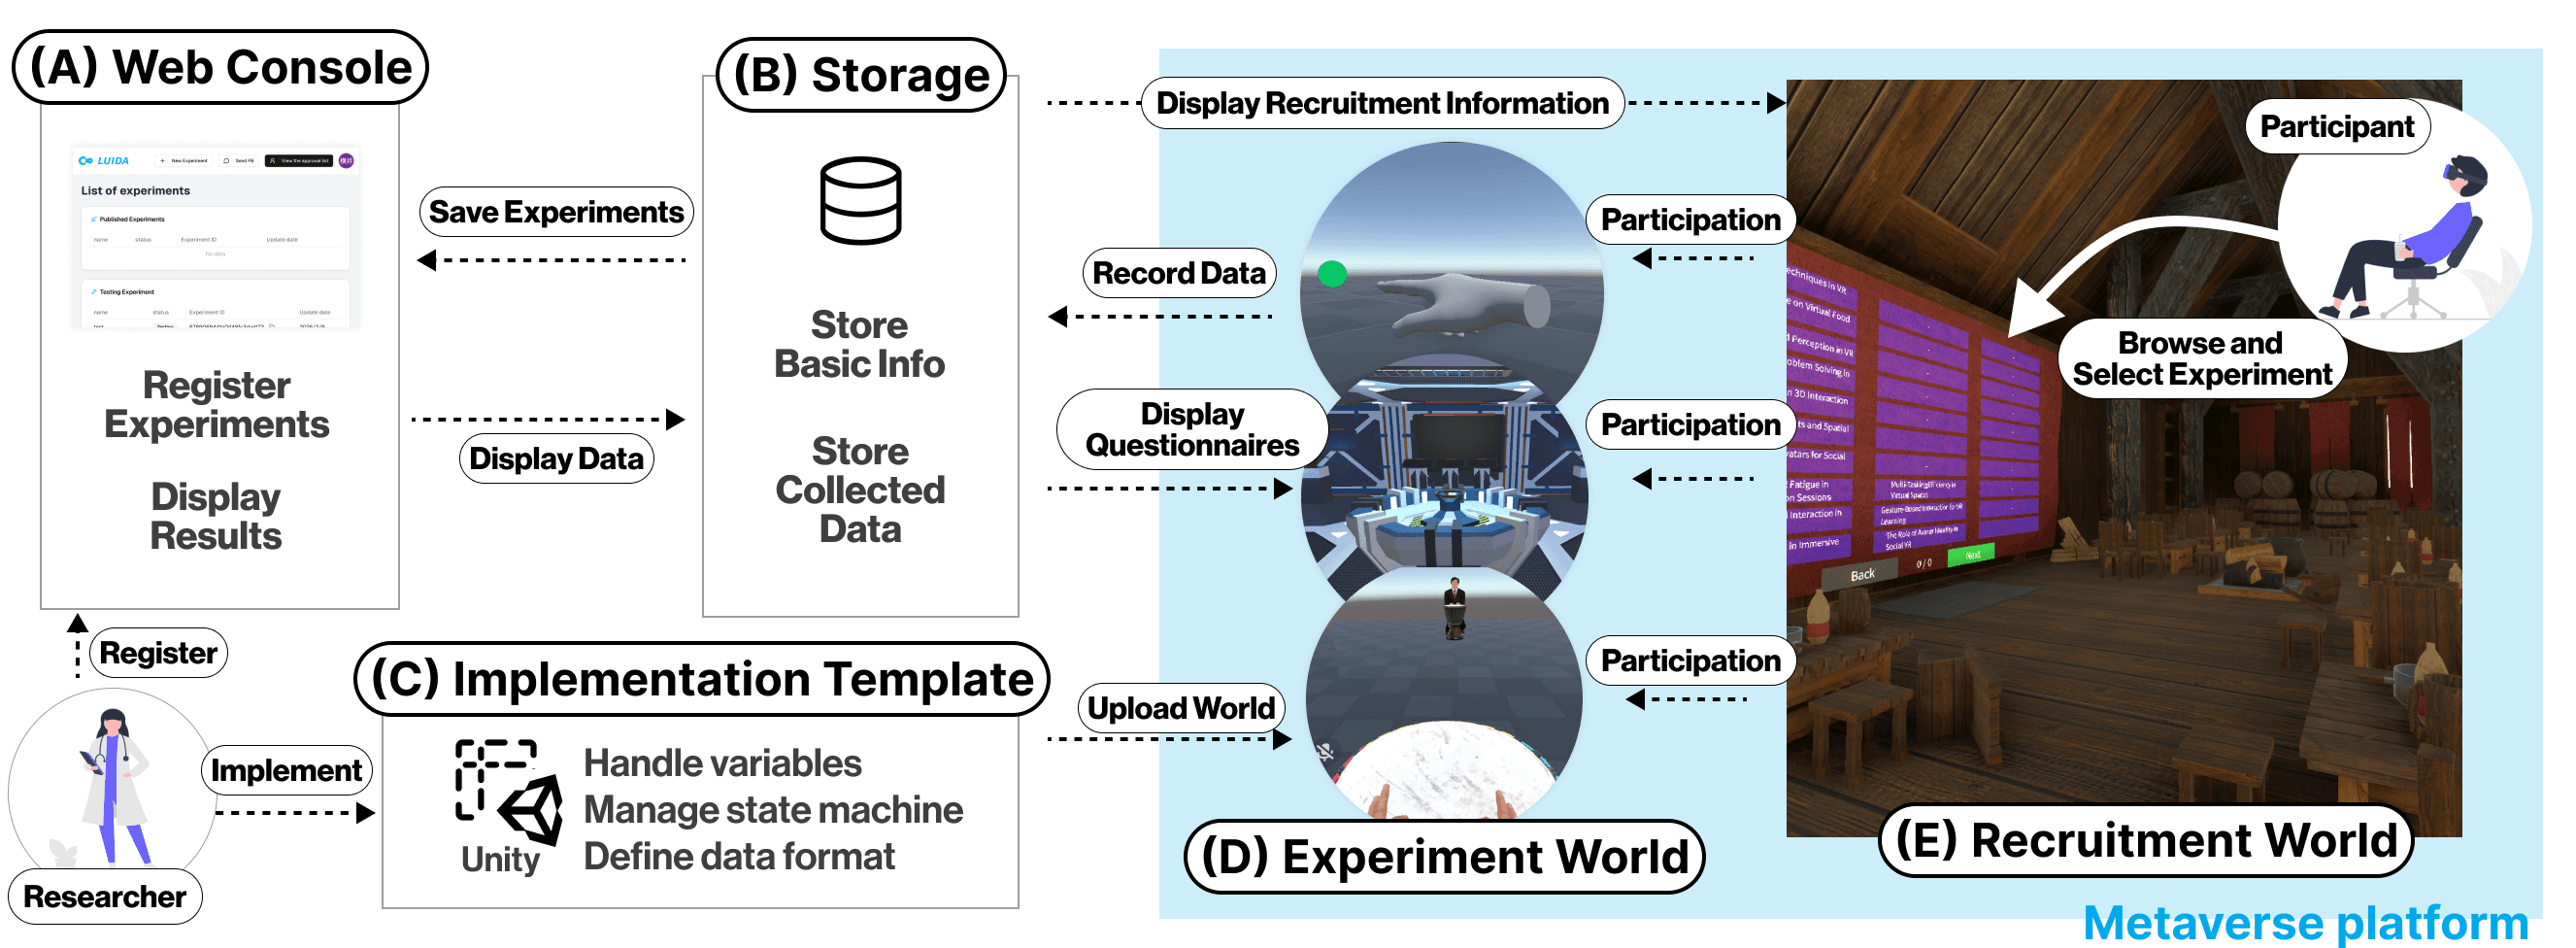
The LUIDA system architecture: Recruitment World, Experiment World, Unity Implementation Template, and Web Console, and the relationships between them.
The components that make up LUIDA, and how they relate.
  • Recruitment World — a Cluster world that hosts a public bulletin board of LUIDA experiments. Participants pick a study here to join.
  • Experiment World — a private instance launched per participant — the very world you built in Unity.
  • Implementation Template (Unity) — the Unity project for implementing your experiment.
  • Web Console — the management UI for registering experiments, designing questionnaires, and downloading data. Registered info and runtime-collected data are persisted to storage, then viewed and edited through the Web Console.

What each component does

Recruitment World

A bulletin board inside Cluster where every published experiment shows up as a tile. Participants pick a tile, walk through the consent form, and are deep-linked into the experiment world. Experiments appear here automatically once you switch their status to PUBLISHED in the Web Console.
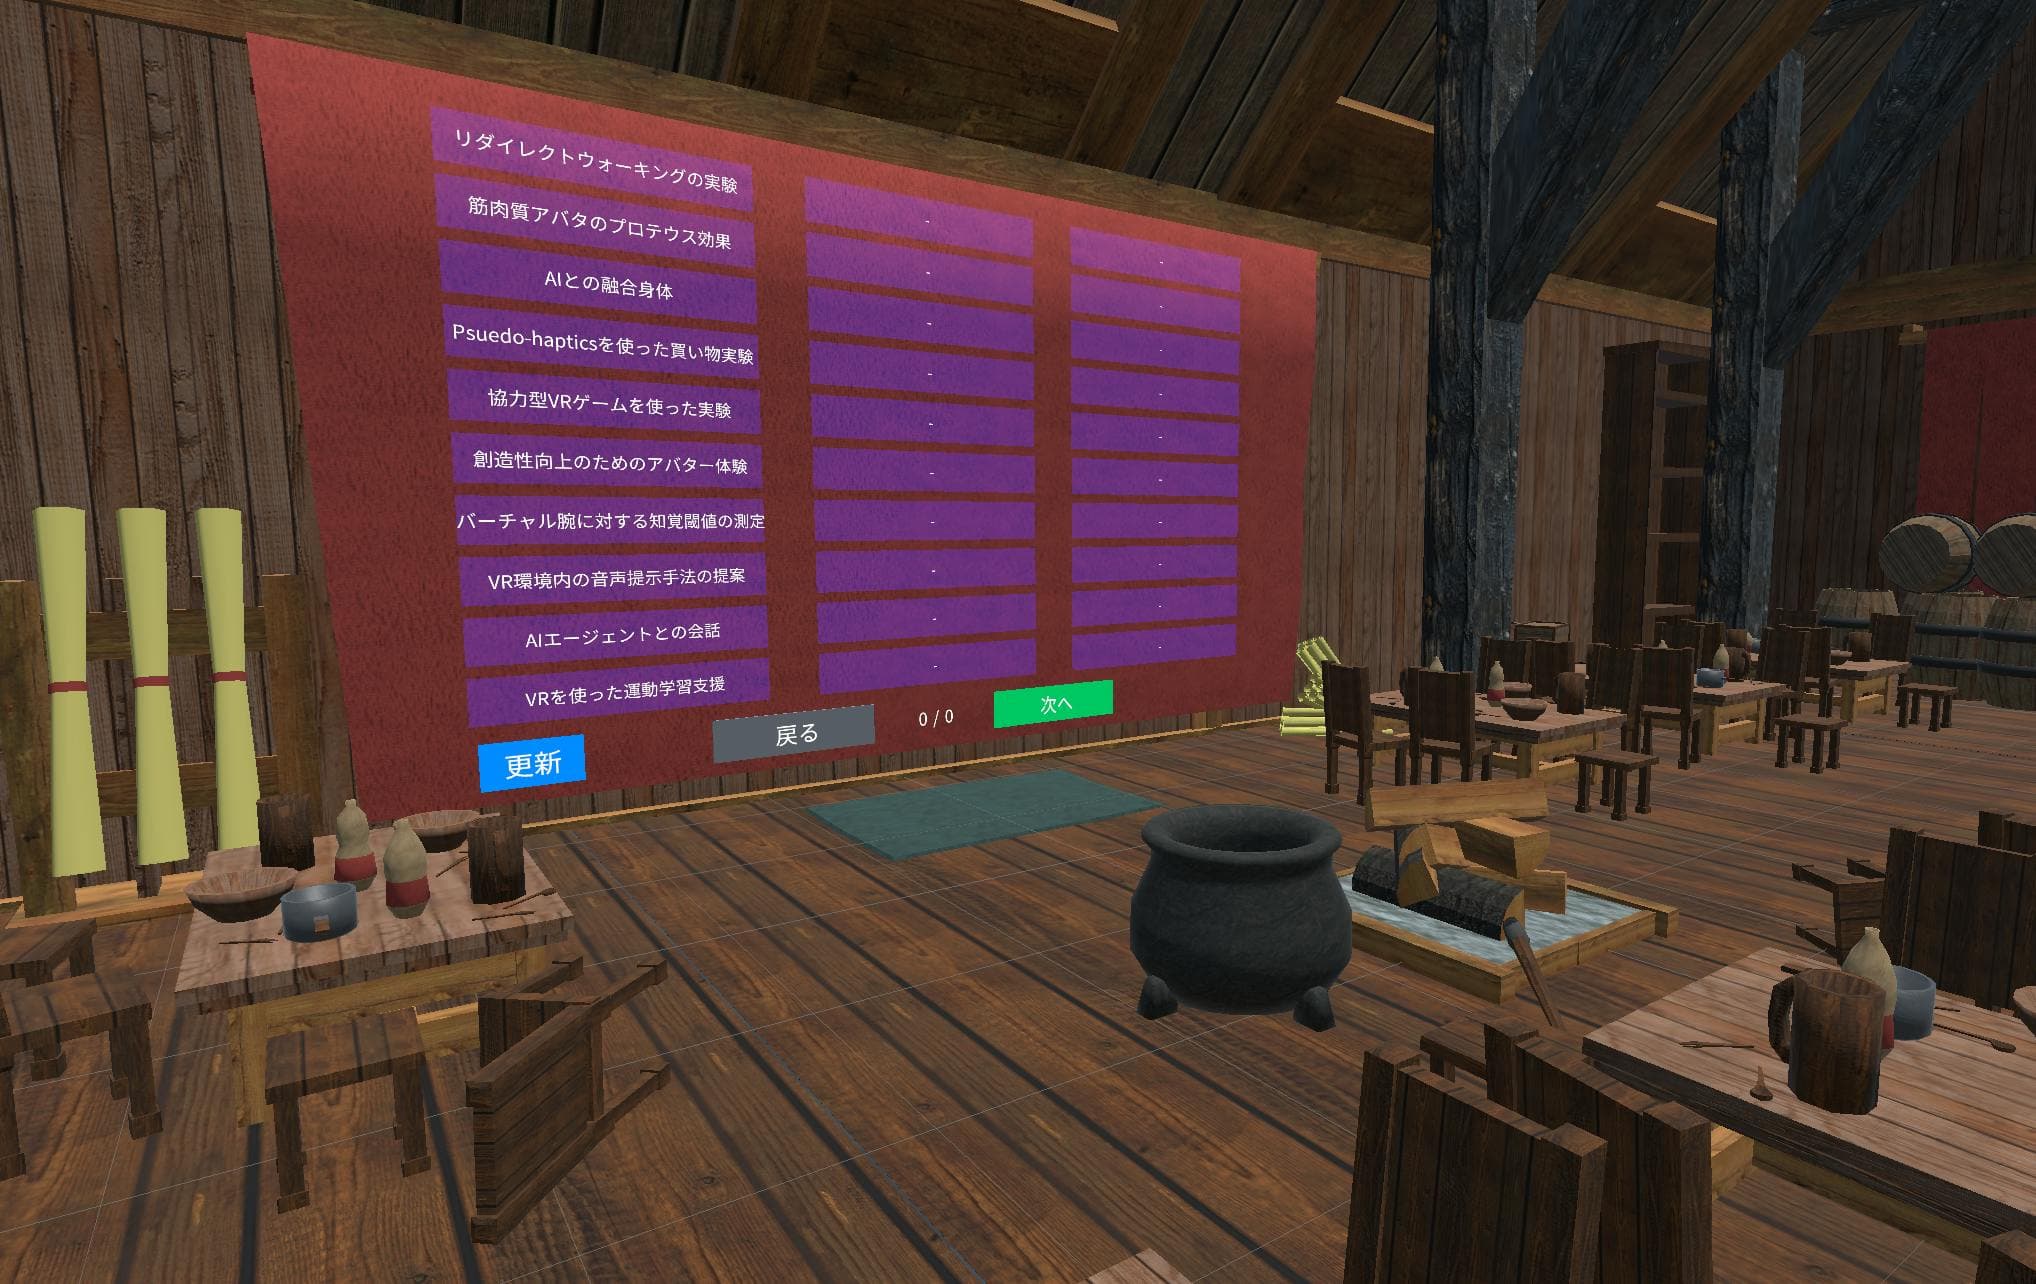
Inside the Recruitment World — a Cluster world with a tavern-style exterior, holding a bulletin board of tiles for the published LUIDA experiments.
The Recruitment World tile grid. Participants pick an experiment here to join its session.

Experiment World

The private per-participant instances of your world. Multiple participants joining at once spawn parallel instances, each running independently — which is how LUIDA reaches a data-collection scale a one-to-one lab session can't. Everything inside is driven by what you configured in the Implementation Template.

Web Console

A management UI at luida.cluster.mu/experiments. Register experiments, design questionnaires, and download data — all from here.

Existing experiments are listed on the home page, and the + New Experiment button in the top-right registers a new one.
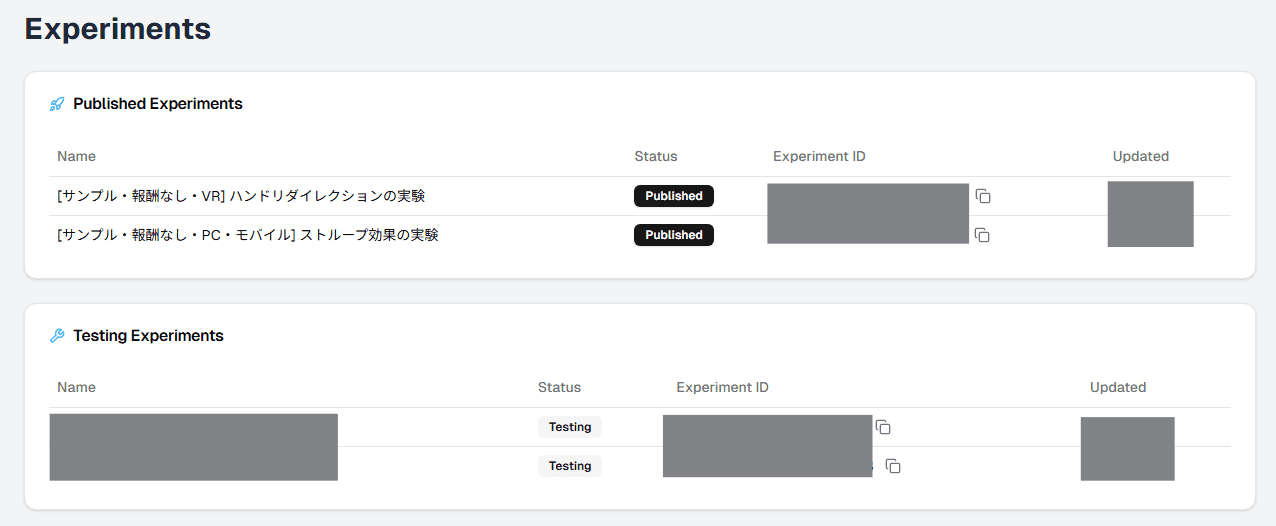
A list of published and testing experiments created by this user.
The Web Console home page, listing the published and testing experiments created by this user.

Each experiment has its own detail page at /experiments/<eID>, where you edit the basic info, world settings, consent form, and other study materials. See Creating an experiment for the full field-by-field walkthrough.
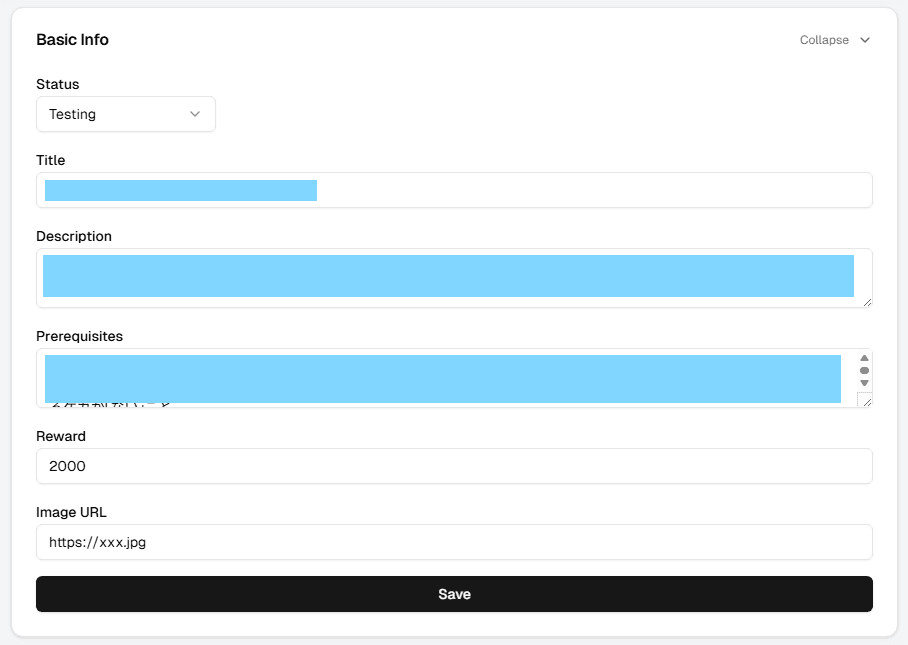
The Basic Info card on the experiment detail page, with fields for title, description, prerequisites, and reward.
Basic info: title, description, prerequisites, reward, and thumbnail — everything that shows up on the recruitment-world bulletin board. The `TESTING` / `PUBLISHED` status toggle also lives here.
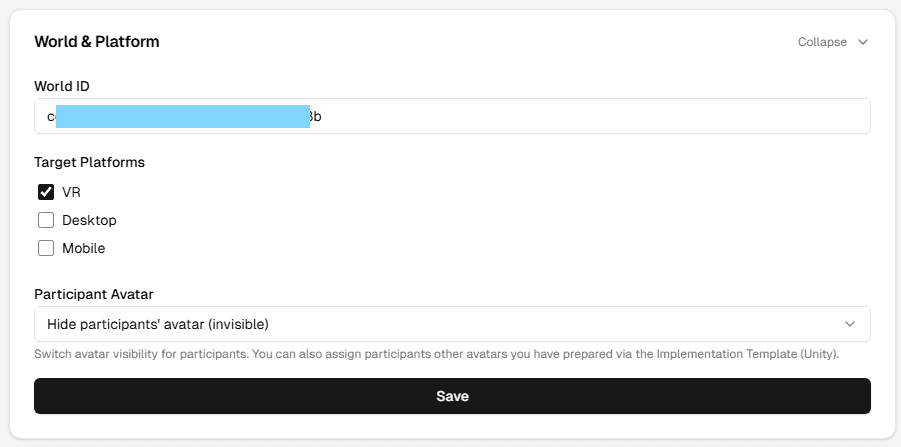
The World & Platform card on the experiment detail page, with World ID, platform checkboxes, and the Participant Avatar dropdown.
World settings: the Cluster World ID, the allowed platforms (VR / Windows / Mac / Android / iOS), and the participant avatar mode (`HIDE` / `DEFAULT` / `UNRESTRICTED`).
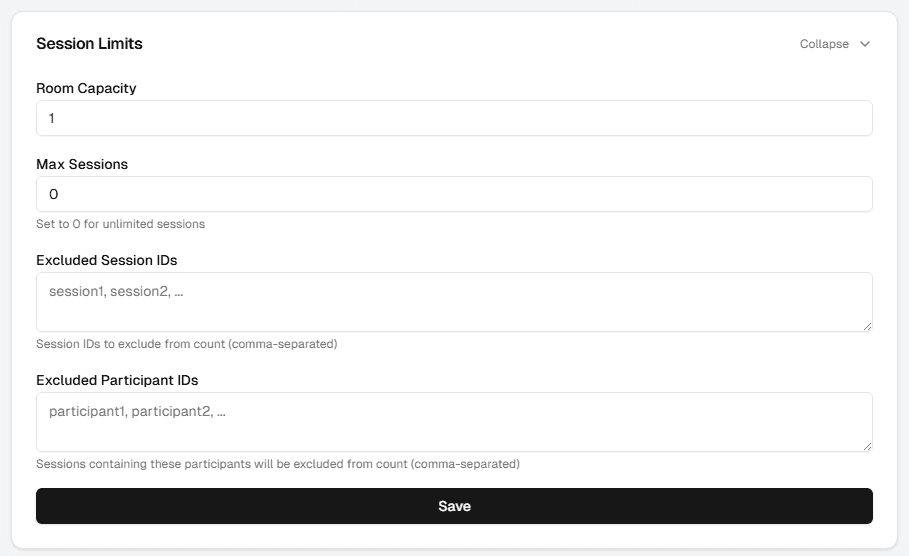
The Session Limits card on the experiment detail page, with Room Capacity and Max Sessions input fields.
Session limits: Room Capacity (max simultaneous participants in one Cluster instance) and Max Sessions (total session cap across the experiment).
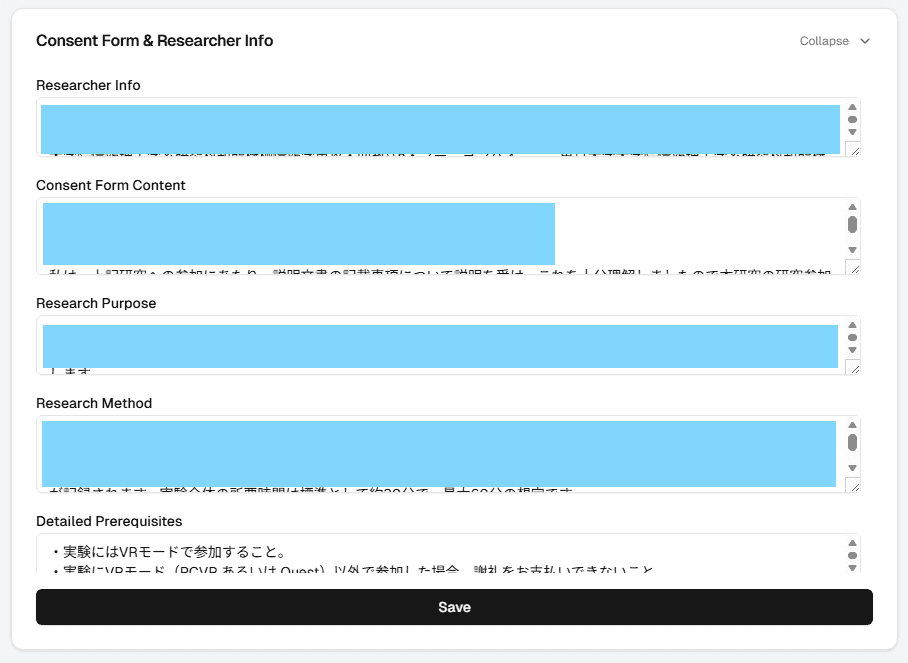
The Consent Form card on the experiment detail page, with fields for research purpose, methods, risks and benefits, and contact.
Consent form: the informed-consent text participants must read at session start, plus researcher contact. Participants who don't agree aren't admitted.

You can build and edit questionnaires per experiment. See Building questionnaires for the full walkthrough.
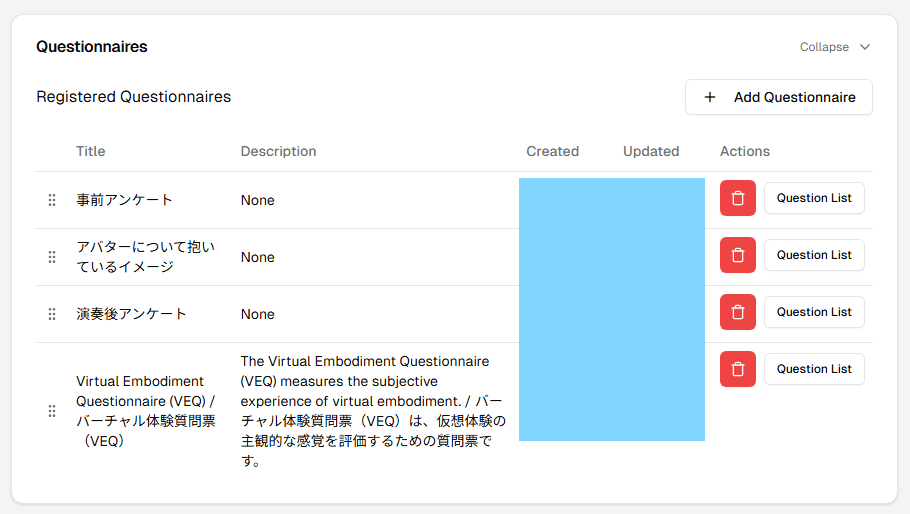
The Questionnaires section of an experiment detail page, listing the questionnaires registered for this study.
Questionnaire list: questionnaires registered for this experiment. Templates for IPQ, SSQ, and VEQ ship with LUIDA.
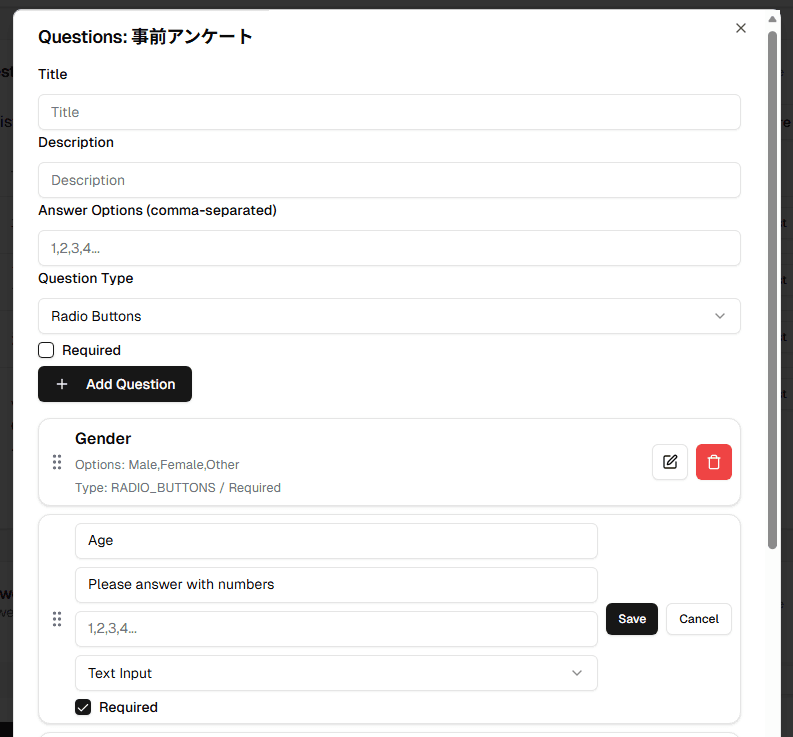
The questionnaire editor, with controls for adding questions, choosing a question type, entering answer options, and toggling required.
Questionnaire editor: add or edit questions and pick an answer format (Radio Button / Linear Scale / Checkboxes / Toggle / Text Input).

You can review collected data in the browser and download it as CSV or JSON. See Downloading data for the full walkthrough.
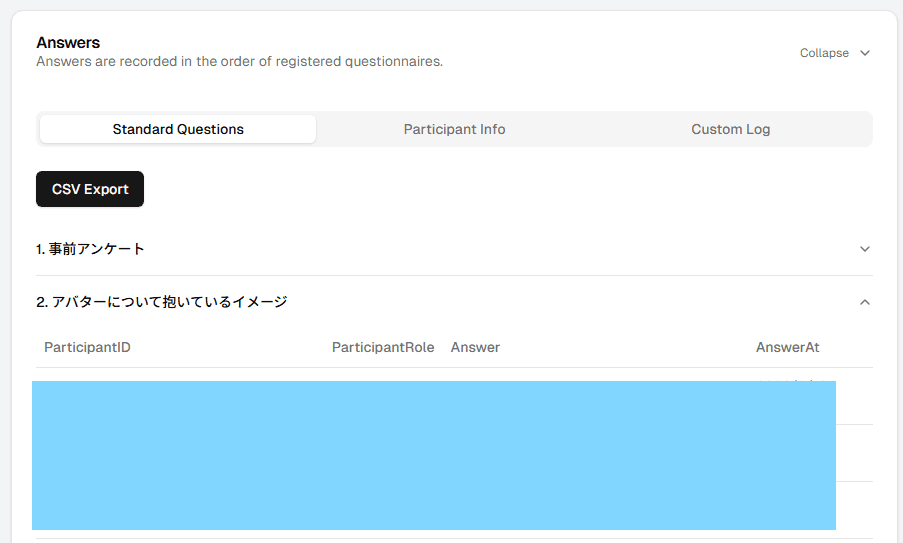
The Questionnaire Answers sub-tab in the Data section, showing rows joined to questionnaire and participant.
Questionnaire Answers: session/participant IDs and the responses to each questionnaire.
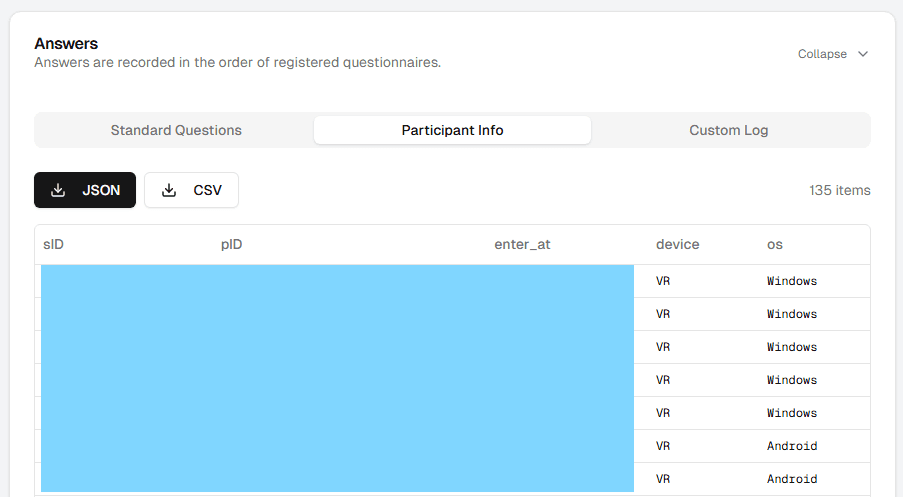
The Participant Info sub-tab in the Data section, showing per-session participant info and between-subjects assignments.
Participant Info: session/participant IDs, entry time, and the OS of the device used at entry.
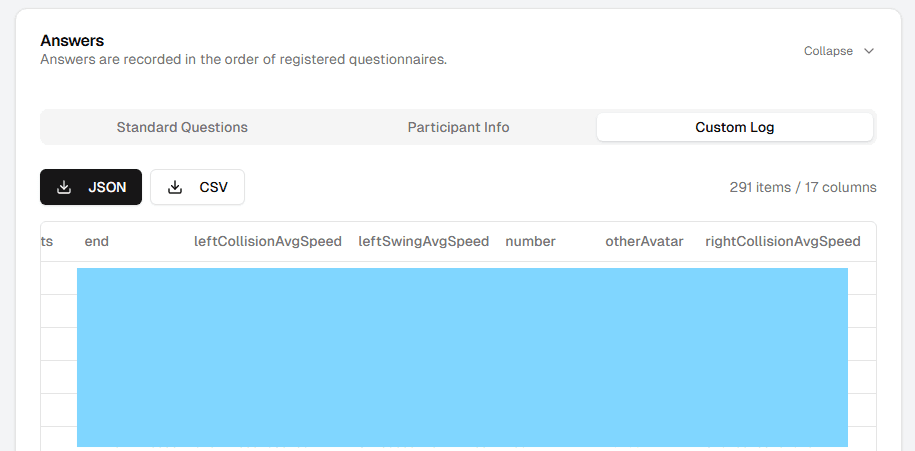
The Custom Logs sub-tab in the Data section, showing custom data rows sent from the Unity scene.
Custom Logs: result data for items defined on the Unity side (e.g., per-trial reaction times, stimulus parameters, HMD/controller position/rotation).

Unity Implementation Template

A Unity 2021.3.4f1 project template (a Unity 6 upgrade is planned) that researchers take as the starting point for building their experiments.
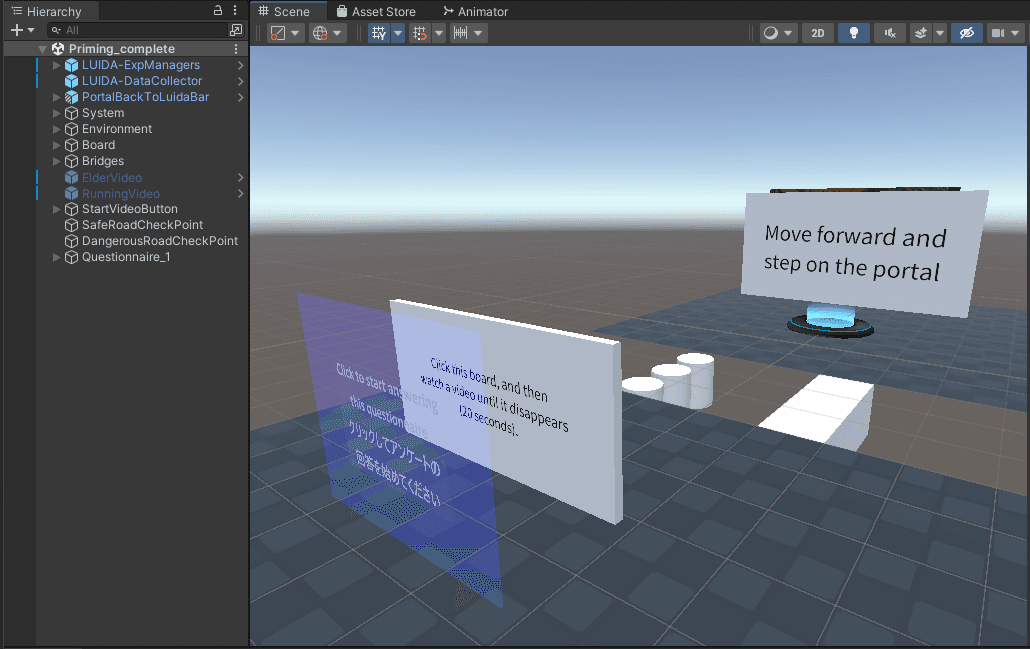
Unity Hierarchy with LUIDA-ExpManagers, LUIDA-DataCollector, and Questionnaire prefabs visible.
A typical scene: the LUIDA prefabs (experiment manager, questionnaire, data collector) sit alongside the custom items you create for your study.
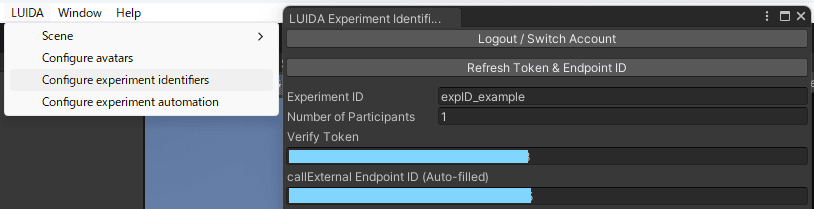
Configure experiment identifiers window.
The window that binds this Unity project to the experiment you registered in the Web Console.
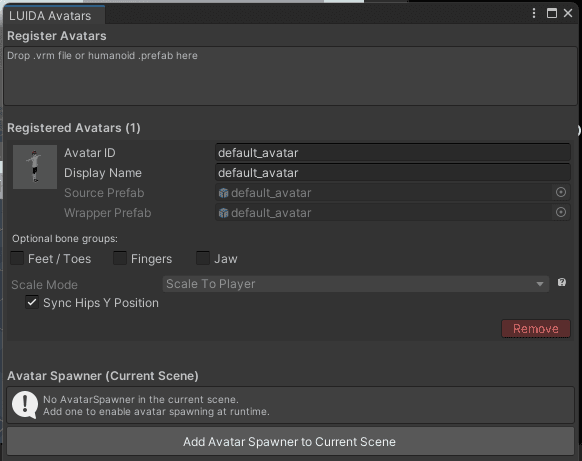
Configure avatars window with three registered avatars.
The window for registering VRM avatars that get assigned to participants at runtime.

If you're already comfortable with the Cluster Creator Kit (CCK) and Cluster Script, you can build a study by combining them with LUIDA's extensions — the questionnaire prefabs and the data-collection components (Trigger Save and Process, Upload Custom Data, and friends).

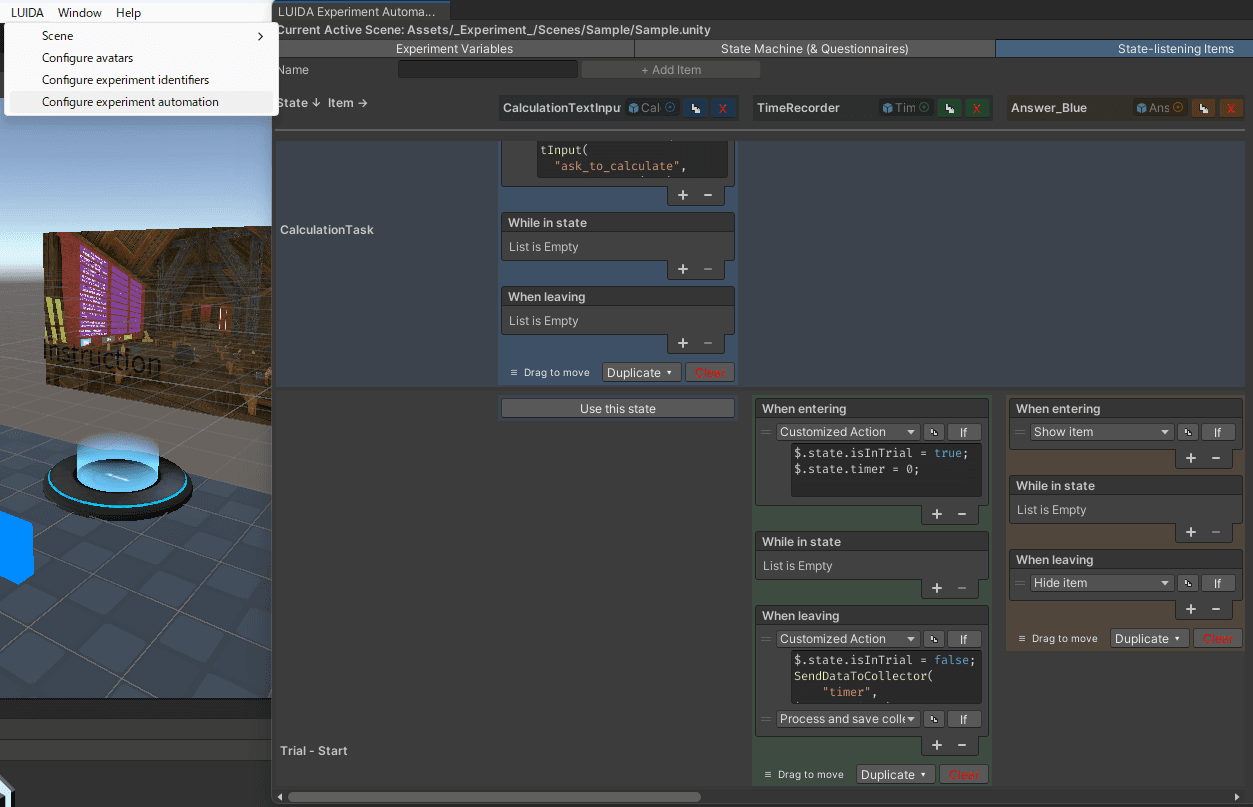
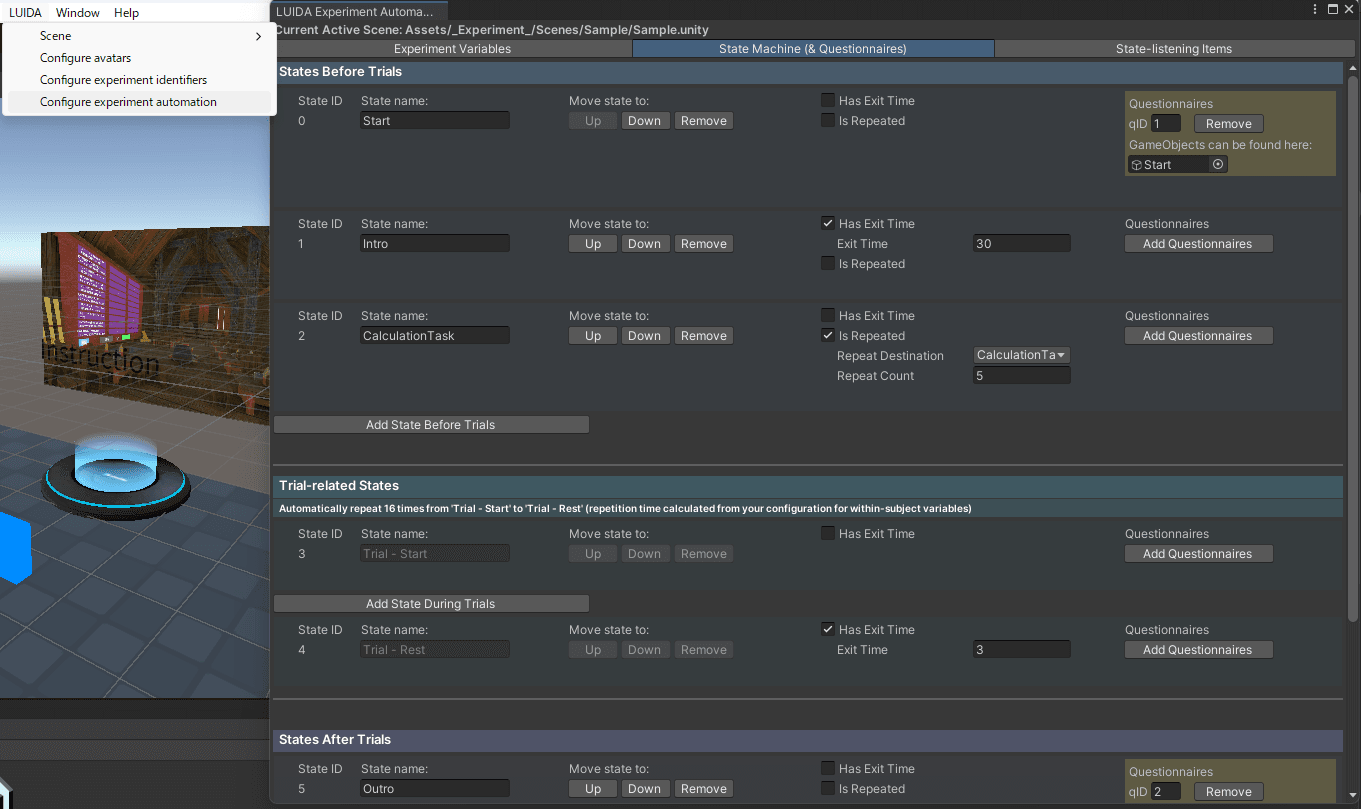
You can also enable Configure experiment automation to pre-define independent variables, the experiment flow (trial order and loops), and how each item behaves during each phase — all from the editor, with little to no CCK or Cluster Script involved. See the editor windows reference for the details.
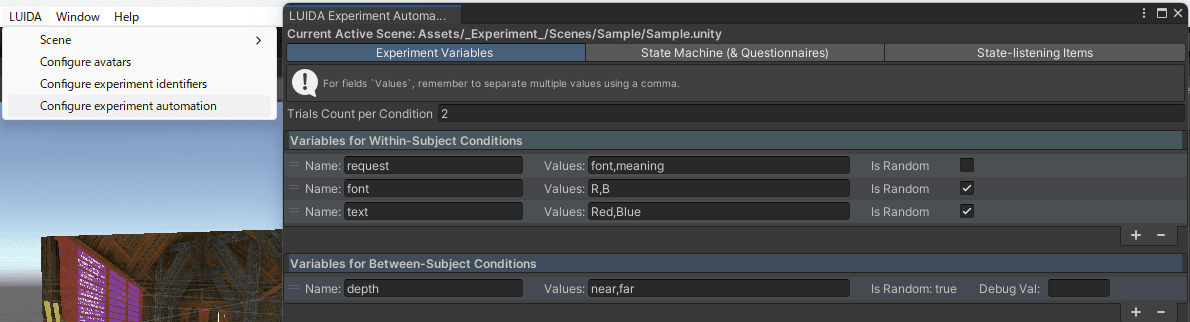
Experiment Variables tab.
Declare the experiment's independent variables (within-subjects and between-subjects); the trial count is computed automatically.
State Machine tab.
Define the experiment's flow as a state machine — trial order, loops, exit conditions for each state, and when each questionnaire appears.
State-listening Items tab.
Configure how each item behaves in each state.

What's next

If you're learning LUIDA for the first time, read in roughly this order:

  1. A researcher's LUIDA workflow: an overview of how a study using LUIDA runs, from idea to data export.
  2. Setup: install Unity, the template, and the required KaomoLab tools, then connect to your Web Console experiment.
  3. Tutorials: build an experiment from scratch with LUIDA.
  4. (Only when you need it) Reference: every action, signal, and API dispatch type.